
Mortal Shell 2 Shells: All Classes & Abilities
Mortal Shell II uses Shells instead of traditional classes. Compare all eight permanent Shells, Harros in the Prologue, their active and passive abilities, combat roles, and unlock routes.
Roster boundary
8 playable Shells. 1 Prologue-only identity.
The official playable roster contains eight Shells. Harros is a separate tutorial identity controlled during the opening sequence, so he is documented without being counted as a ninth permanent Shell.
- Official playable roster
- 8
- Prologue only
- 1 · Harros
Visual compendium
Every Shell appearance, separated by roster status
Nine documented identities are shown below, but only the first eight belong to the official playable roster.
Main roster
Official playable roster 8 Shells
These Shells can be found, unlocked and used after the Prologue.
Permanent playable
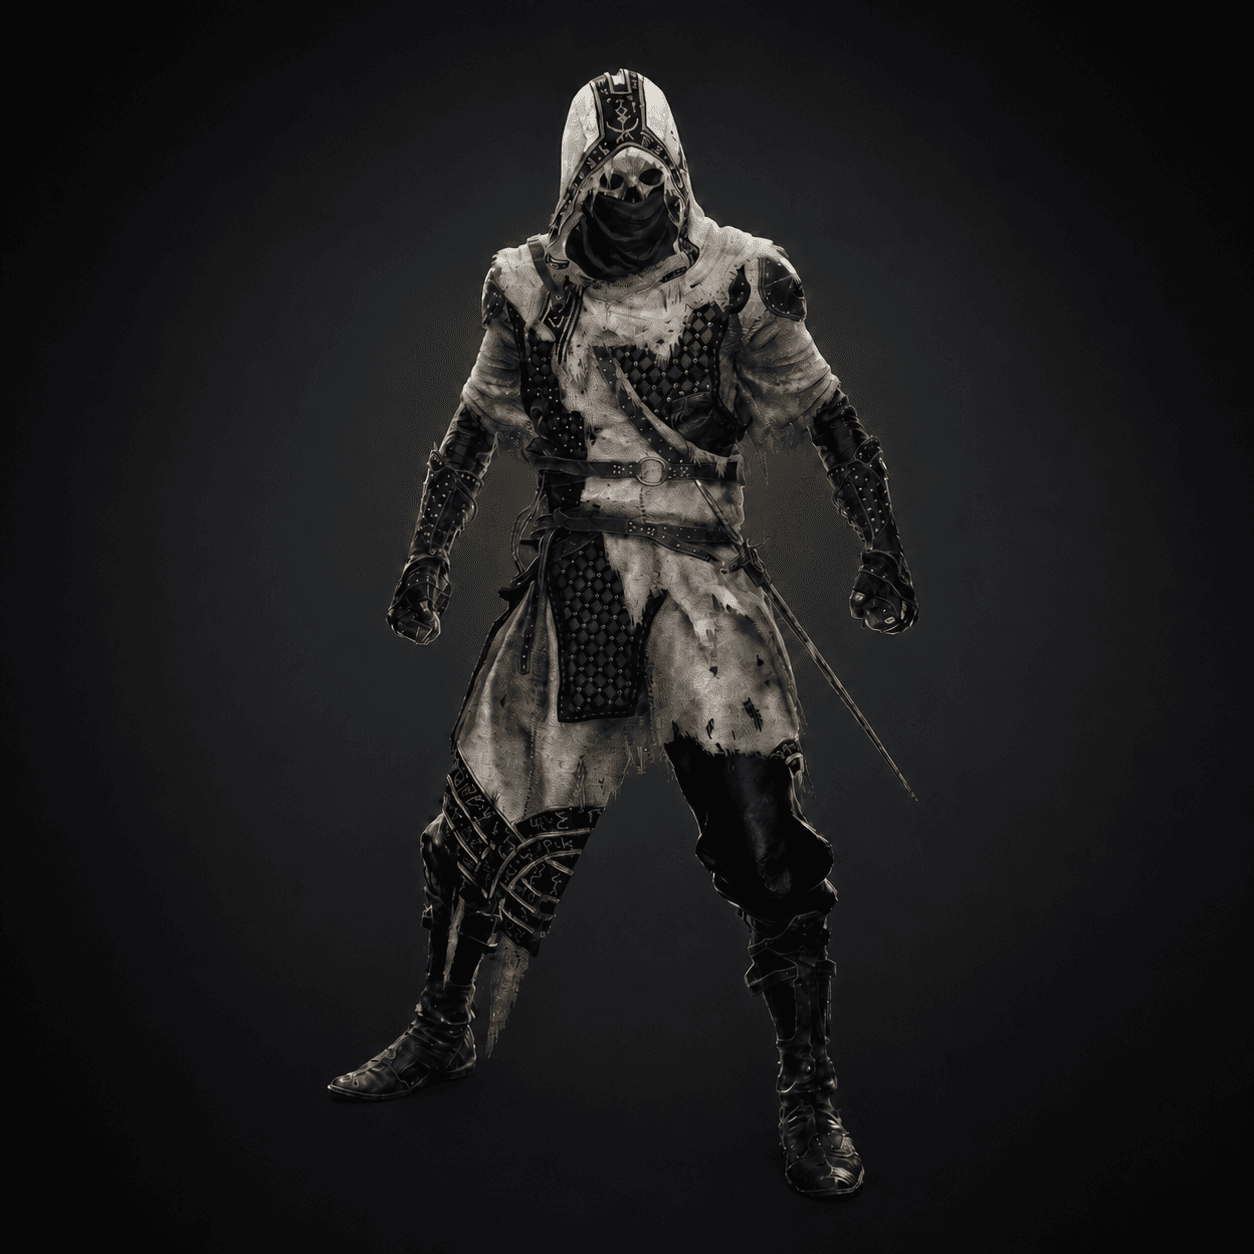
Tiel the Acolyte
Stealth explorer; invisibility and critical strikes.
- Signature kit
- Lingering Shadow · Shadow Dash
- Route
- Torch-lit grave east of Mushroom Village.
- Requires
- None known
Cross-checked guides · not yet tested in-game · 2026-08-19

Permanent playable
Proxima the Broodseeker
Durable aggressor; hook, lightning follow-up, damage mitigation.
- Signature kit
- Biosampler · Grafted Armor
- Route
- Shattered Beacon, first level (northeast of Blackridge Pass).
- Requires
- None known
Cross-checked guides · not yet tested in-game · 2026-08-19
Permanent playable
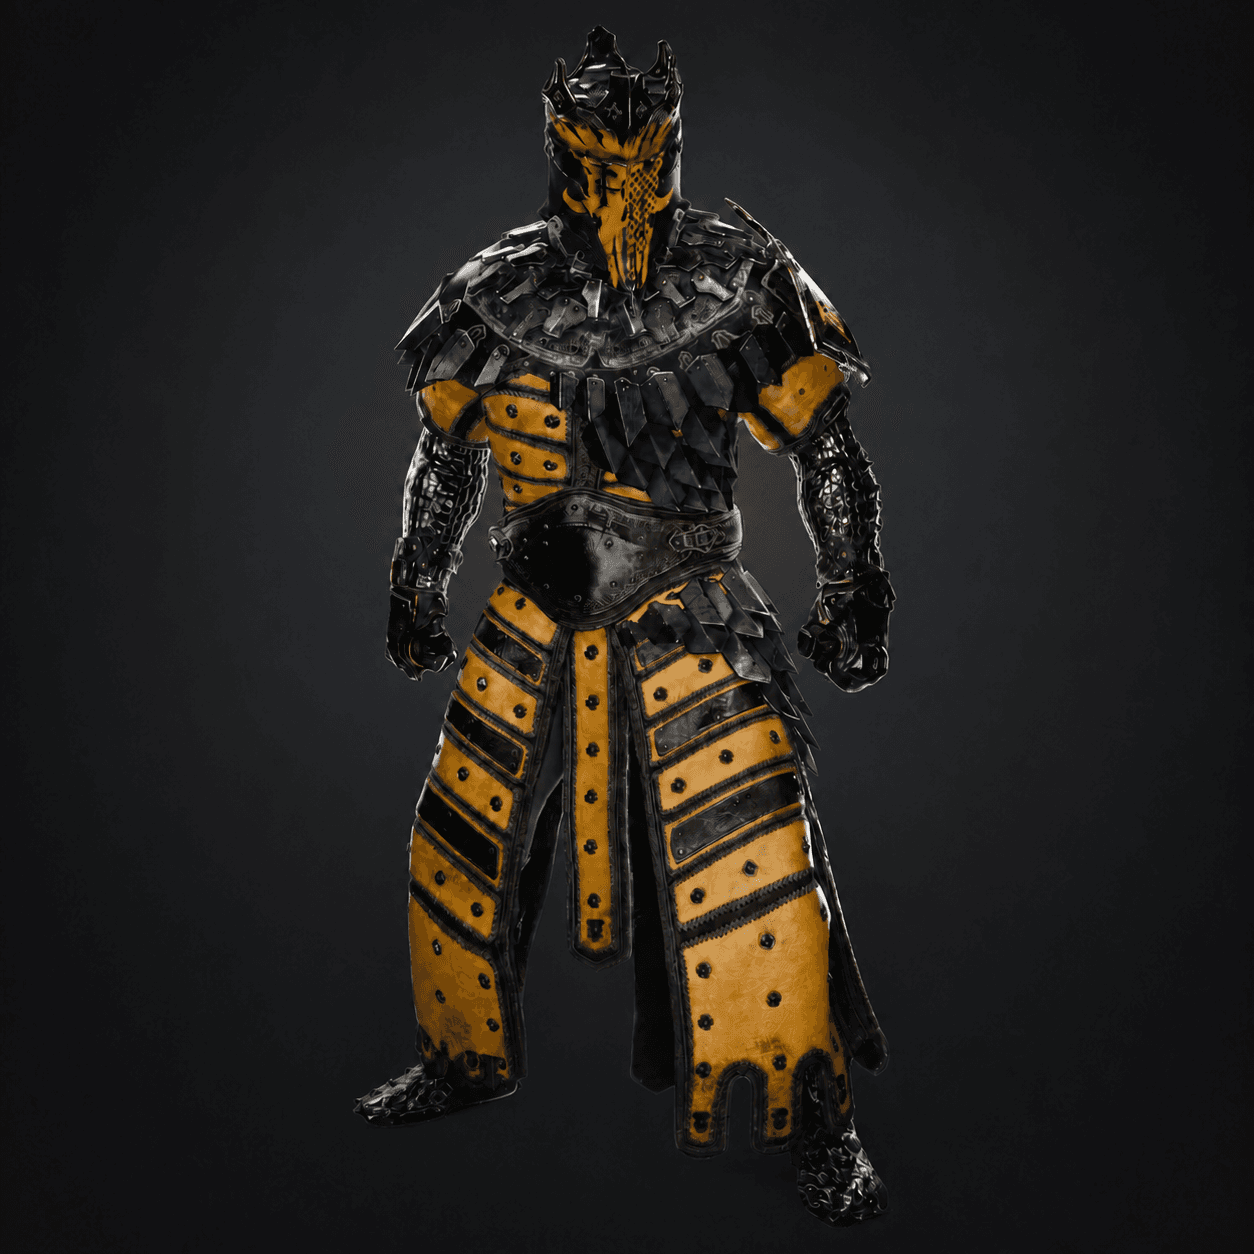
Eredrim the Venerable
Boss specialist; Shoulder Bash, posture break, executions.
- Signature kit
- Shoulder Bash · Executioner
- Route
- Citadel of Penance, after defeating the Warden.
- Requires
- Defeat the Warden
Cross-checked guides · not yet tested in-game · 2026-08-19

Permanent playable
Gragu the Insatiable
NPC-quest Shell tied to the One-Legged Wolf Tavern.
- Signature kit
- Revered Heart · kill-powered recovery
- Route
- One-Legged Wolf Tavern; bring the Heart of Vatra from the Temple of Vatra.
- Requires
- Heart of Vatra quest
Cross-checked guides · not yet tested in-game · 2026-08-19

Permanent playable
Sester Genessa the Wayward
Training NPC turned Shell; separate Harbinger form.
- Signature kit
- Doubles · Duality and Stray state
- Route
- Marrow Keep; recover her censer via the Revenant Graves, then defeat Sester Secondus.
- Requires
- Censer quest + Sester Secondus
Cross-checked guides · not yet tested in-game · 2026-08-19
Permanent playable
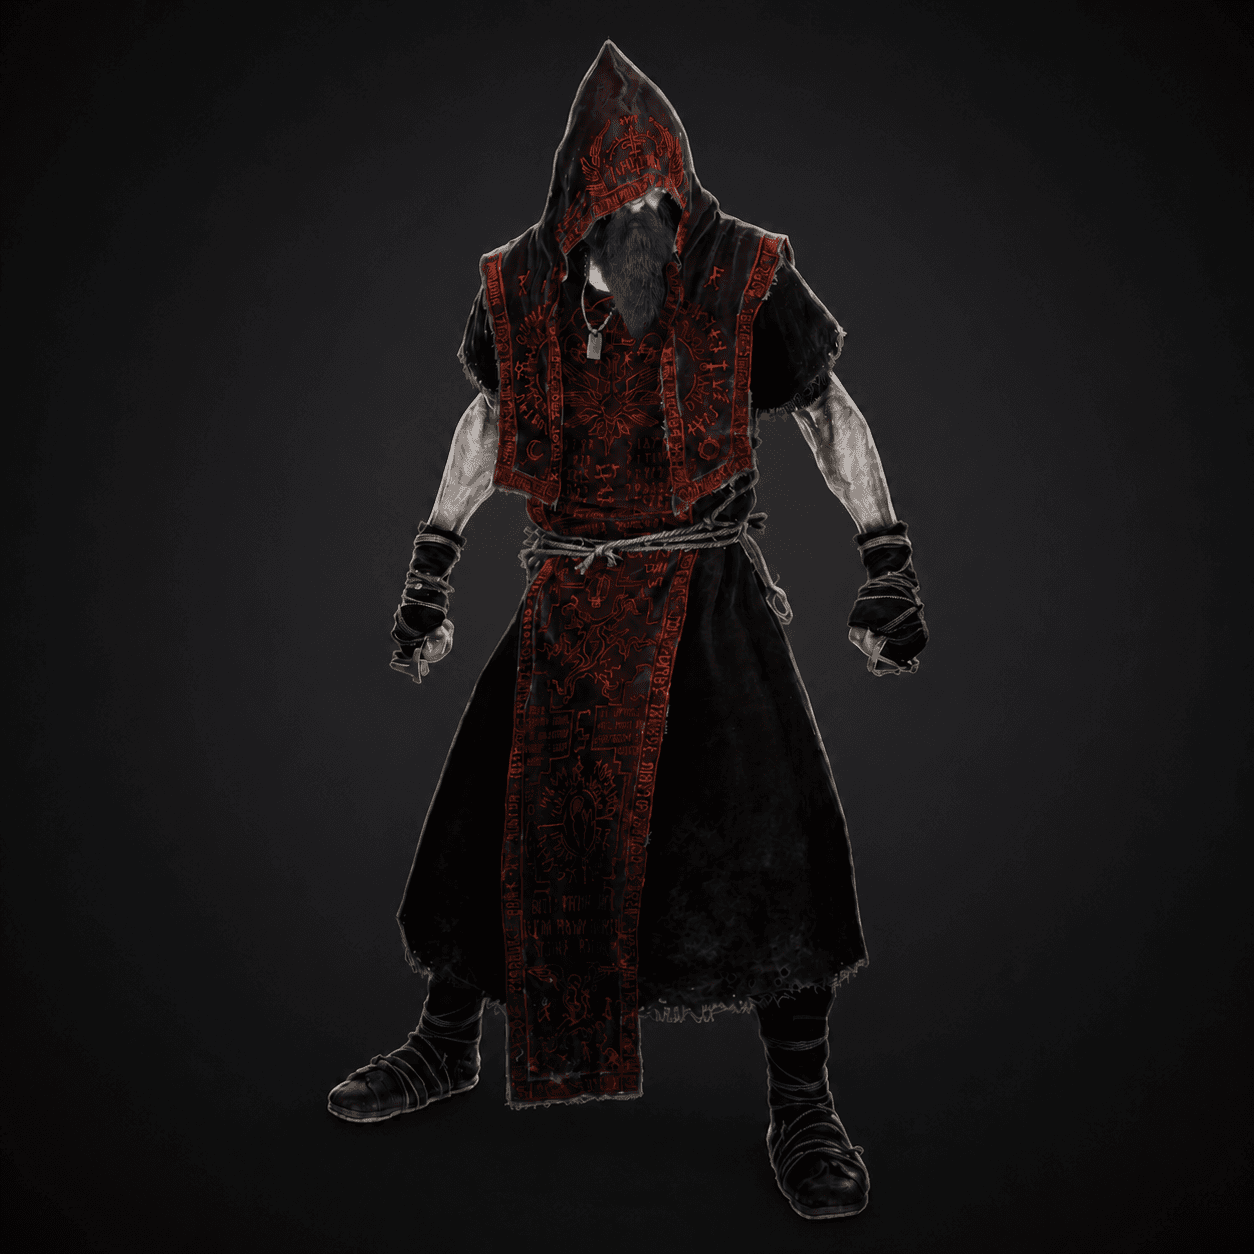
Smert the Apostate
Late-game Shell near the Outskirts of Nochte.
- Signature kit
- Miracle · time-stop burst window
- Route
- Prophet’s Rest near the Outskirts of Nochte; interrupt three cultist groups.
- Requires
- Interrupt three cultist rituals
Cross-checked guides · not yet tested in-game · 2026-08-19
Permanent playable
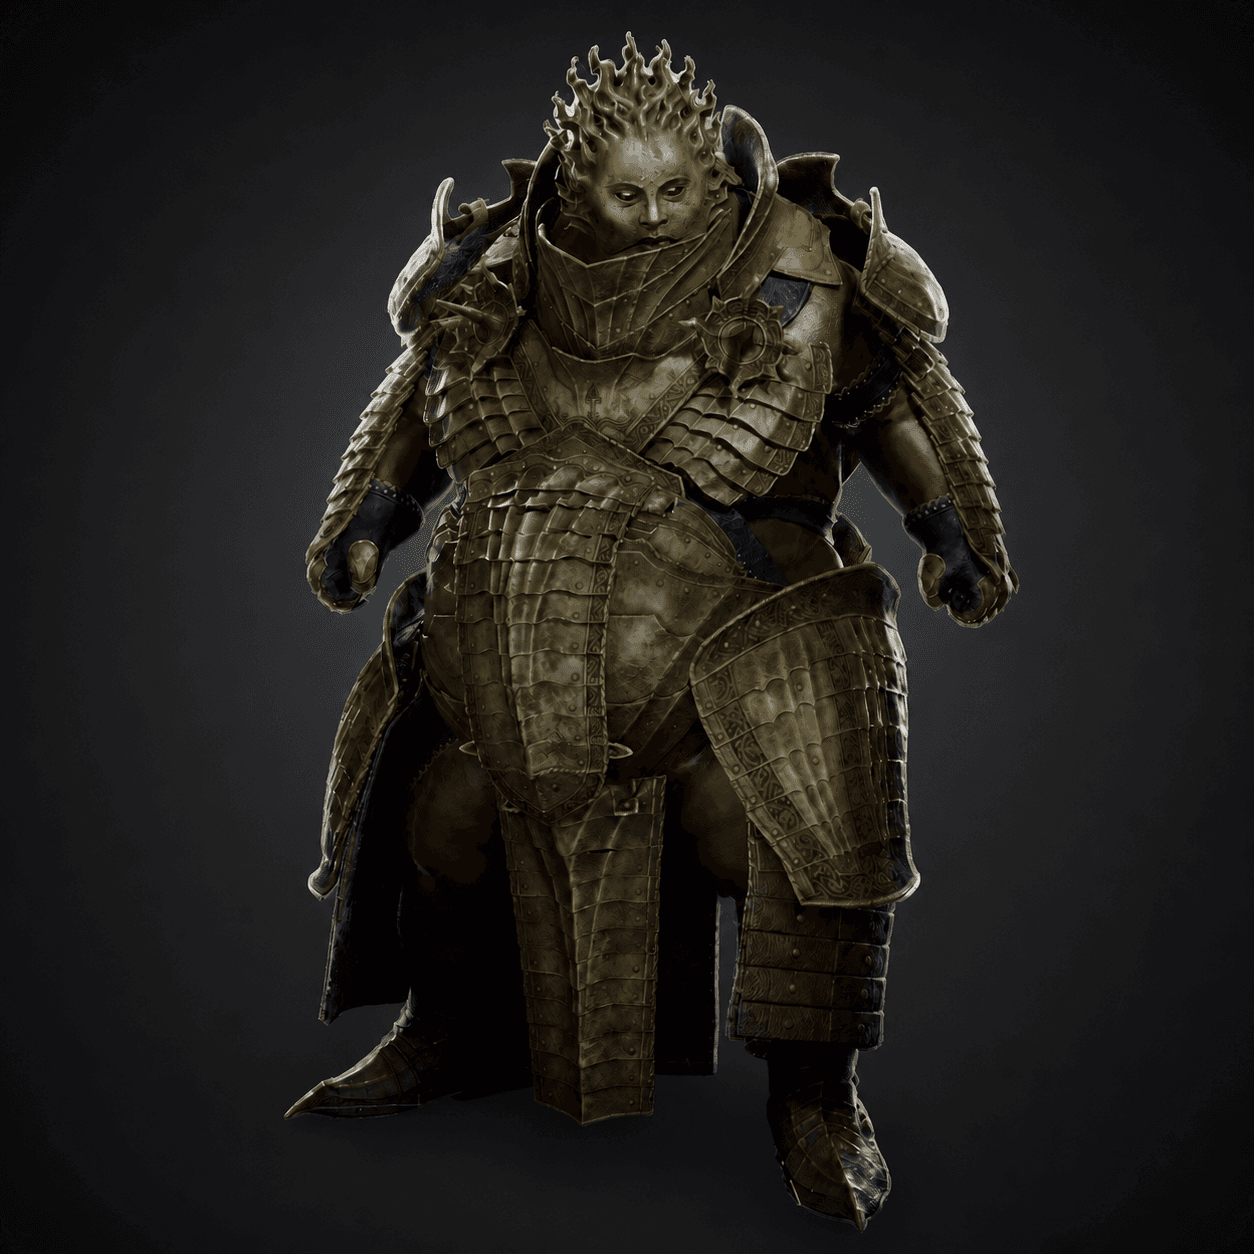
Lazlo the Justiciar
Fire-resistant durable Shell tied to the Mammon storyline.
- Signature kit
- Heat · Retribution shockwaves
- Route
- Royal Crypt of Mammon, beyond Vellen, High Lord of Mammon.
- Requires
- Defeat Vellen
Cross-checked guides · not yet tested in-game · 2026-08-19
Permanent playable
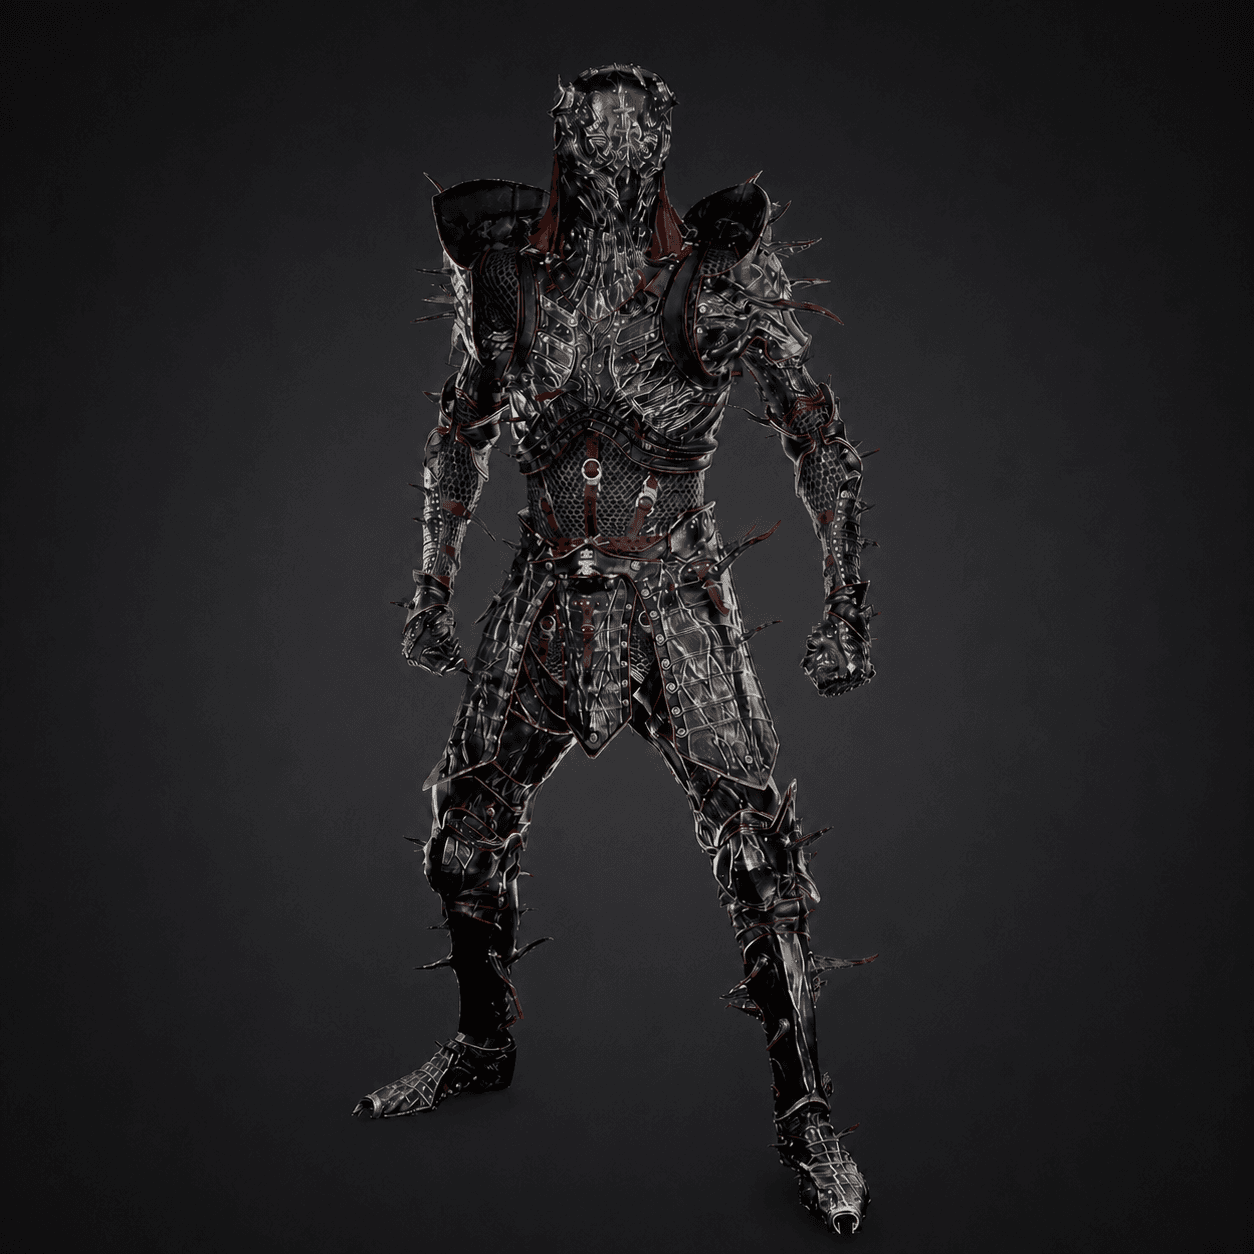
Sariel the Endless
Repeated-boss Shell; also rewards the Clockwork Scythe.
- Signature kit
- Purge · Pain and Curse thorns
- Route
- Fought near Silent Steps, then again in the Chamber of Becoming; break the four stones to end the resurrection loop.
- Requires
- Complete the Sariel encounter chain
Cross-checked guides · not yet tested in-game · 2026-08-19
Prologue appendix
Prologue-only Shell · Harros
Prologue only
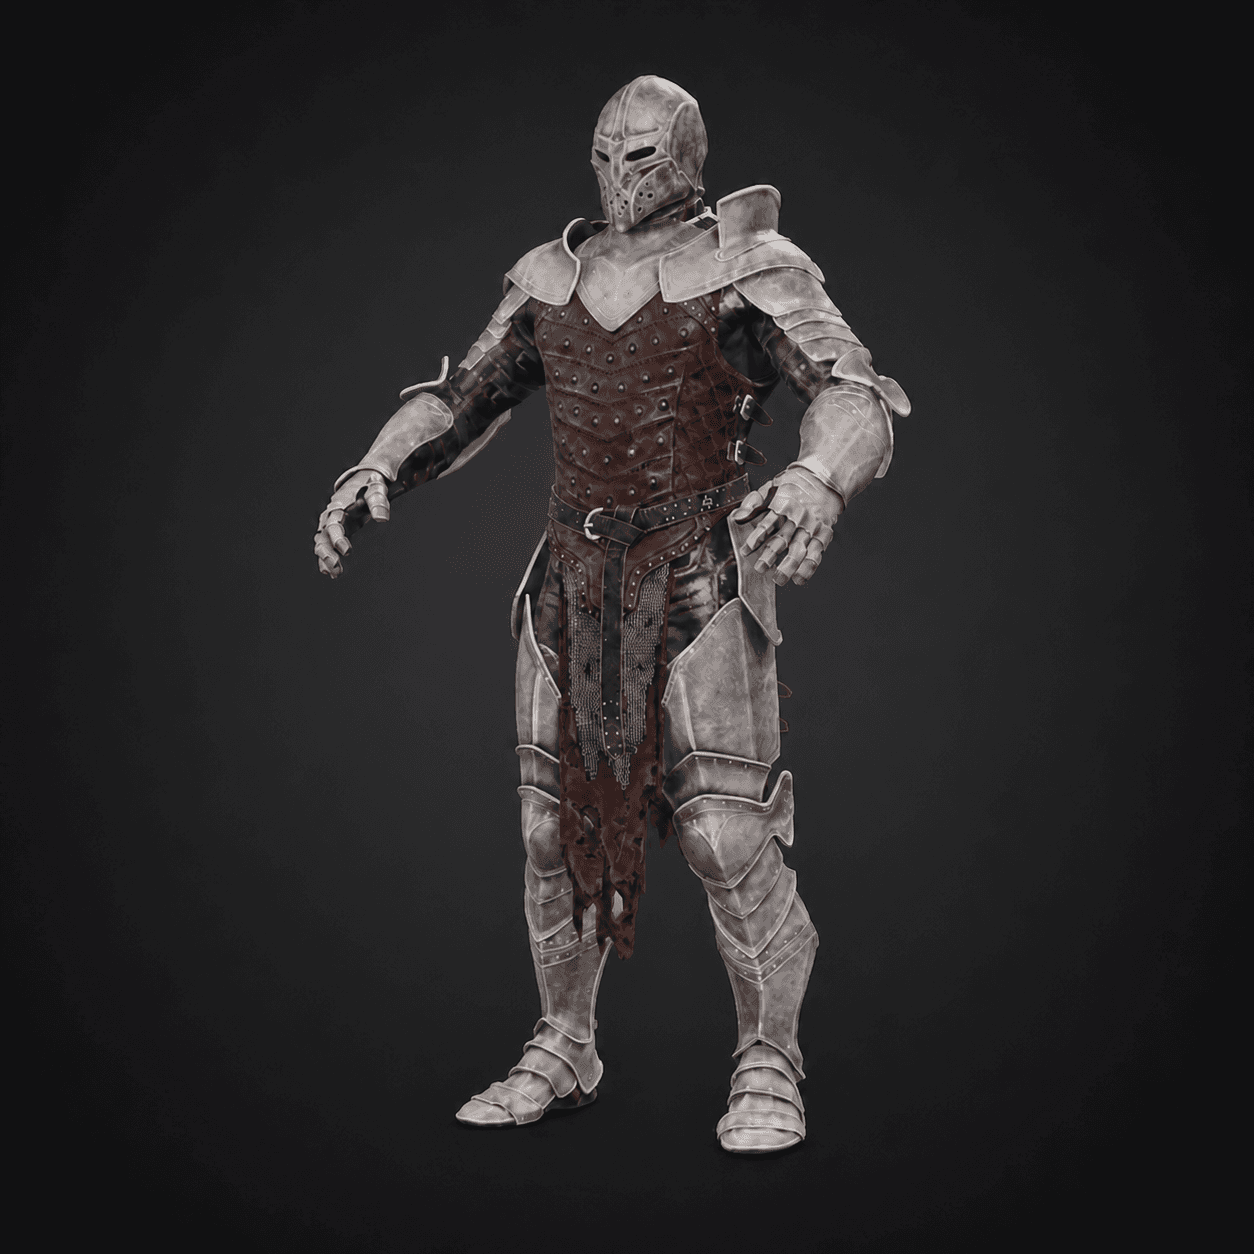
Harros the Vassal
Prologue helper Shell; stone stun and melee punishment.
- Signature kit
- Stone stun · melee punishment
- Route
- Unlocked during the Prologue alongside the starting weapon set.
- Requires
- None known
Cross-checked guides · not yet tested in-game · 2026-08-19
Intent picker
Choose by the mistake you want your Shell to solve
Tiel the Acolyte is the clearest starting point for players who want a precise dodge to create a safer punish window. Proxima is the sturdier alternative.
This rule maps stated goals to documented kit identity. It is not a balance tier list.Derived comparison
Compare roles and unlock routes
| Shell | Status | Combat identity | Region | Prerequisite | Verification |
|---|---|---|---|---|---|
| Official playable roster · 8 Shells | |||||
| Tiel the Acolyte | Permanent playable | Stealth explorer; invisibility and critical strikes. | Fainweald | None known | Cross-checked guides · not yet tested in-game2026-08-19 |
| Proxima the Broodseeker | Permanent playable | Durable aggressor; hook, lightning follow-up, damage mitigation. | Fainweald | None known | Cross-checked guides · not yet tested in-game2026-08-19 |
| Eredrim the Venerable | Permanent playable | Boss specialist; Shoulder Bash, posture break, executions. | Multiple | Defeat the Warden | Cross-checked guides · not yet tested in-game2026-08-19 |
| Gragu the Insatiable | Permanent playable | NPC-quest Shell tied to the One-Legged Wolf Tavern. | Multiple | Heart of Vatra quest | Cross-checked guides · not yet tested in-game2026-08-19 |
| Sester Genessa the Wayward | Permanent playable | Training NPC turned Shell; separate Harbinger form. | Marrow Keep | Censer quest + Sester Secondus | Cross-checked guides · not yet tested in-game2026-08-19 |
| Smert the Apostate | Permanent playable | Late-game Shell near the Outskirts of Nochte. | Multiple | Interrupt three cultist rituals | Cross-checked guides · not yet tested in-game2026-08-19 |
| Lazlo the Justiciar | Permanent playable | Fire-resistant durable Shell tied to the Mammon storyline. | Mammon | Defeat Vellen | Cross-checked guides · not yet tested in-game2026-08-19 |
| Sariel the Endless | Permanent playable | Repeated-boss Shell; also rewards the Clockwork Scythe. | Multiple | Complete the Sariel encounter chain | Cross-checked guides · not yet tested in-game2026-08-19 |
| Prologue appendix · outside official roster | |||||
| Harros the Vassal | Prologue only · not in official 8 | Prologue helper Shell; stone stun and melee punishment. | Prologue | None known | Cross-checked guides · not yet tested in-game2026-08-19 |
How classes work
Mortal Shell 2 does not ask you to lock in a conventional class during character creation. Its class system is the collection of fallen warriors called Shells. Possessing one changes your active ability, passive effect, skill tree, resistances, and the rhythm of combat, while weapons, sidearms, Seals, and most Tarstones remain shareable.
Current launch-build sources list eight permanent Shells: Tiel, Proxima, Eredrim, Gragu, Smert, Sester Genessa, Lazlo, and Sariel. Harros teaches the system during the Prologue but is not listed as a permanent post-Prologue choice, producing nine encountered identities when he is included. Early guides report conflicting totals, so this page keeps the categories separate and will need rechecking if a patch changes the roster.
All Mortal Shell 2 classes at a glance
The comparison hub above derives the current roster, role, route, requirement, evidence state, and verification date from the same records used by the Map and collection tools. “Class” remains a search-friendly synonym; in game menus and dialogue, Shell is the correct term.
Mortal Shell 2 Shell abilities
Tiel enters Shadow with Lingering Shadow and converts that state into a dagger strike. Shadow Dash rewards a well-timed dodge with Shadow and extra stagger pressure, making Tiel a strong learning Shell for players who prefer movement over trading hits.
Proxima’s Biosampler hook pulls a lighter enemy toward her or carries her toward a larger target. Grafted Armor can soften an incoming hit and helps her stay close. Eredrim attacks posture directly: Shoulder Bash creates Break opportunities, Ethereal Diapason affects nearby threats, and Executioner rewards finishing weakened enemies.
The later Shells change the resource loop more dramatically. Gragu replaces ordinary recovery with Revered Heart sustain. Smert’s Miracle creates a time-stop window for planned burst damage. Genessa calls doubles to reproduce attacks and, through Duality, enters her dangerous Stray state instead of being immediately separated when her normal health is depleted.
Lazlo builds around armor, heat, and Retribution shockwaves. Sariel converts part of incoming damage into Pain through Purge, then spends that risk through curse-inflicting thorns. These kits are powerful when their resource rules are understood, but less forgiving than Tiel or Proxima during a blind first route.
Best class for each playstyle
- Safe first class: Tiel, because a precise dodge creates invisibility and a clean punish window.
- Direct melee class: Proxima, whose hook and armor keep pressure close to the target.
- Boss Break class: Eredrim, once Shoulder Bash and execution tools are developed.
- Burst class: Smert, for players willing to plan damage inside a short time-control window.
- Summoner class: Sester Genessa, whose doubles reward weapon and sidearm coordination.
- Sustain class: Gragu, if kill-powered healing fits the route.
- Tank class: Lazlo, with armor and heat-based pressure.
- High-risk technical class: Sariel, whose Pain and Curse mechanics reward aggression after taking damage.
There is no universal best Shell. Start with the body whose passive solves your most common mistake, then match the active ability and weapon to the same plan. The best Shell guide compares the safest early choices in more detail.
Where to unlock every Shell
Tiel and Proxima are the practical first detours. Tiel rests in a torch-lit grave south of Mushroom Village and southeast of Widow’s Overlook. Proxima lies inside Shattered Beacon near Blackridge Cliffs. Eredrim is claimed through the Citadel of Penance after the Warden encounter.
Gragu begins as an NPC in the One-Legged Wolf Tavern and requires the Heart of Vatra from the nearby temple. Smert is tied to the ritual pools at Prophet’s Rest. Sester Genessa requires her censer route through Revenant Graves before she can be selected as a Shell.
Lazlo waits beyond the Mammon crypt route, while Sariel’s chain ends in the Chamber of Becoming. Destroy the four stones during Sariel’s final encounter or the resurrection loop continues. Harros needs no hunt: the Prologue provides him automatically and removes him when the wider journey begins.
How Bond and respec work
Glimpses raise Bond with an individual Shell and open deeper tiers of that Shell’s tree. That investment does not upgrade every class at once, so committing to one or two main Shells is more efficient than spreading the currency across the full roster. Approximate location reveals also cost Glimpses; use them only when a route clue is not enough.
Shell points inside an unlocked tree can be refunded and reassigned. Use that flexibility to swap resistance, stagger, or status priorities before a difficult region. A respec changes the build within a Shell; it does not transfer Bond progress from one Shell to another.
Frequently asked questions
What are classes called in Mortal Shell 2? They are called Shells. Each is a fallen warrior with a distinct active, passive, and upgrade tree.
How many Mortal Shell 2 classes are there? At the time of this update, launch-build coverage documents nine encountered identities when Harros is counted and eight permanent post-Prologue choices. A roster-changing patch could alter that total.
Can you change class? Yes. After unlocking another Shell, return to the appropriate hub service or Beacon option and switch. Your shared equipment can move with you.
Can Shell abilities be reset? Shell points can be reassigned, but Glimpses spent to raise one Shell’s Bond are tied to that Shell.
Source notes
Roster, ability names, and unlock routes were cross-checked against launch-build guide databases and current walkthrough coverage. Those sources currently support the eight permanent Shells plus tutorial-only Harros model, but the page preserves the early count discrepancy and should be rechecked after roster-changing patches. Balance recommendations may also change, so class identities, ability names, and route landmarks are kept separate from tier-list opinions.